Loading component...
At a glance
QUESTION
Can Power Query import multiple CSV files on one query?
ANSWER
Yes it can. The easiest method is to dedicate a folder (directory) where you save your CSV files.
When you create the Query, it will work with the files already in the folder. When you add files to the folder, they will automatically be included in the Query output table whenever the Query is refreshed.
Power Query automates importation and cleansing of data from most sources.
Power Query is a free add-in to some Excel versions and is included as part of Excel 2016. Most versions from Excel 2010 onwards can use Power Query.
Power Query is called Get & Transform in Excel 2016 and is in the Data ribbon.
This article assumes that Power Query is already installed and enabled. The seven CSV files I am importing are all in a folder called 2017, which is a sub-folder of a folder called Data.
The folders can be downloaded here. You will need to save the Data folder to your system to follow along. The CSV files are small but Power Query can handle large data sets.
Importing multiple CSV files
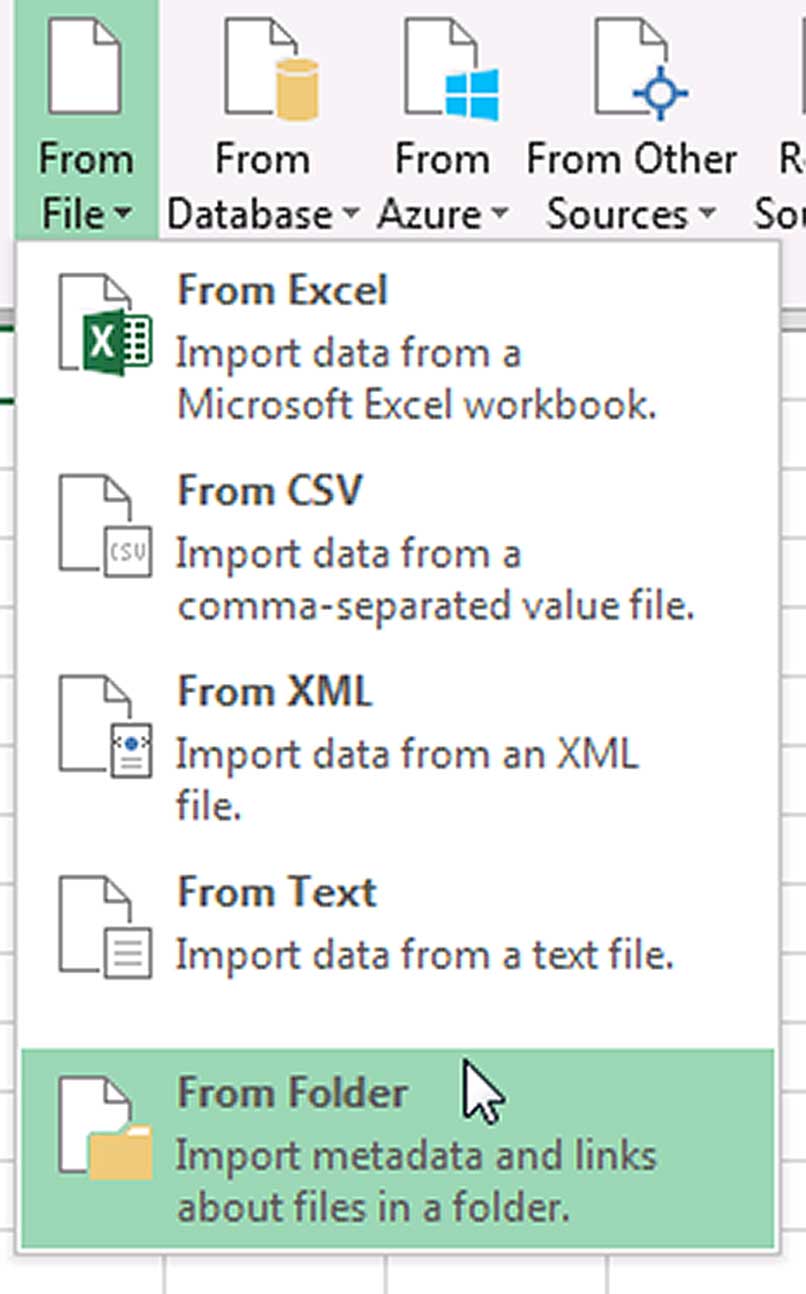
1. Open a new Excel file. In the Power Query ribbon tab click the From File icon drop-down and choose the From Folder option as per Figure 1. In Excel 2016 click the Data ribbon then click the New Query drop-down and select From File and then From Folder.
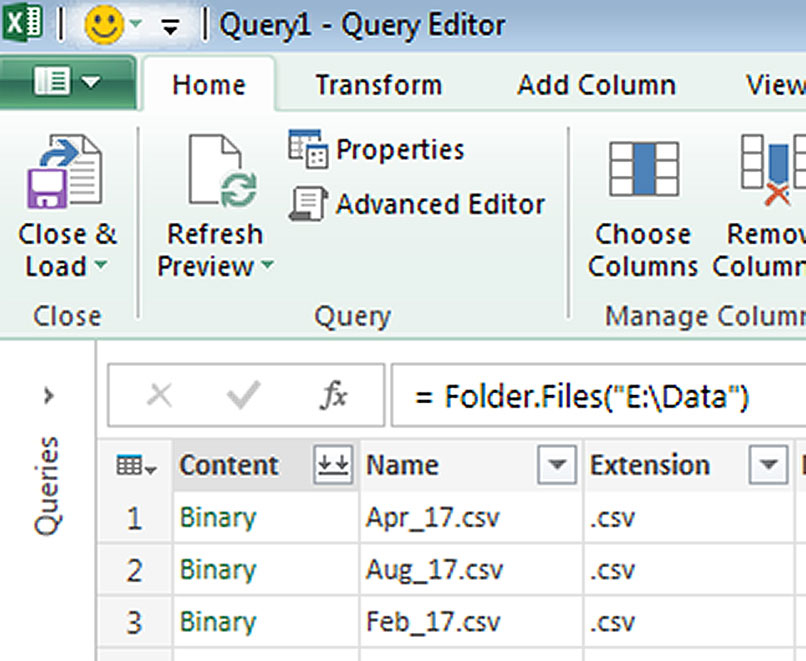
2. Use the Browse button to navigate to the Data folder (not the 2017 folder – see note about sub-folders at the end of the article) and click OK. This will open a new Query Editor window (Figure 2). This is a separate interface to Excel and most of Excel’s shortcuts do not work in this window.
Note: There is no Undo command in the Query Editor, see note at the end of the article. You can’t access the Excel screen while this window is open.
Since other file types may be saved in this folder I recommend filtering by CSV files. This can be difficult when you only have CSV files in the folder. The following steps enable the filtering.
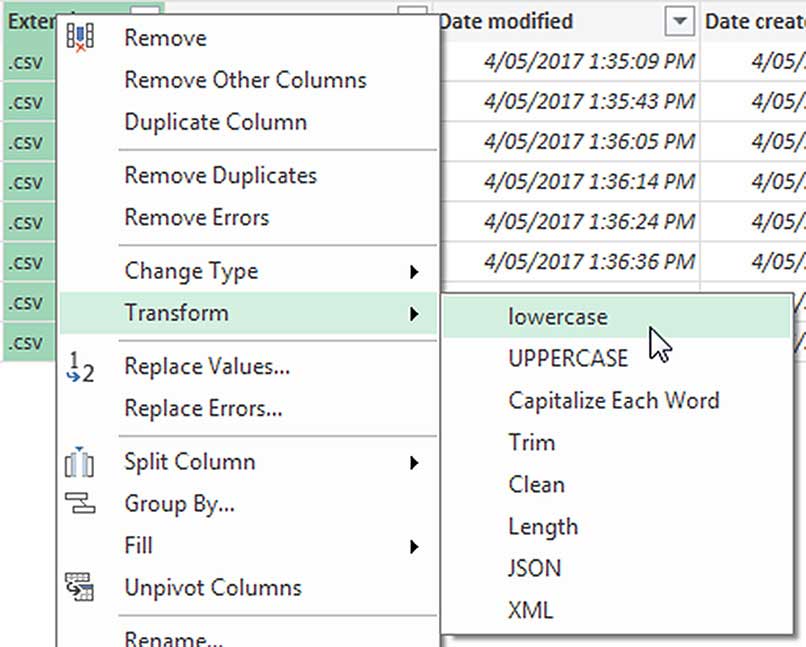
3. Right-click the Extension column and choose Transform and then lowercase. See Figure 3.
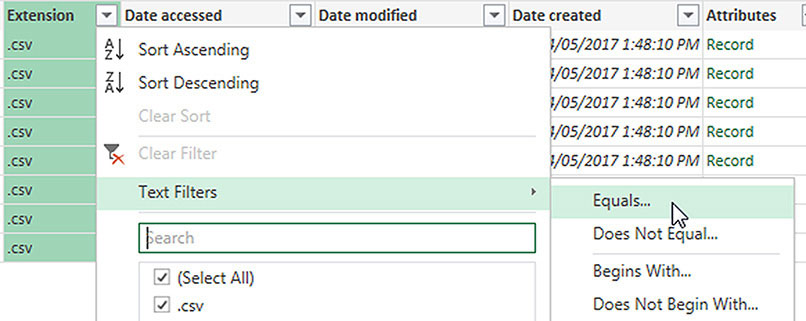
4. Click the filter drop-down on the Extension column, then choose Text Filters and then Equals – see Figure 4.
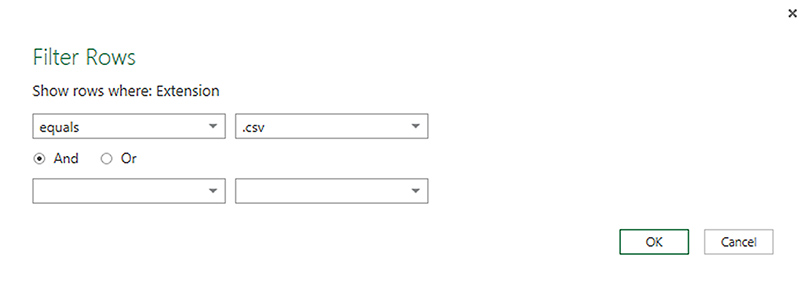
5. In the right-hand box enter .csv in lowercase and click OK – Figure 5. Nothing will change on the screen because there are only CSV files in the folder.

6. The Content column has a special icon instead of the filter drop-down. See Figure 6. Some Power Query users call this a magic button – when you click it, you will see why.
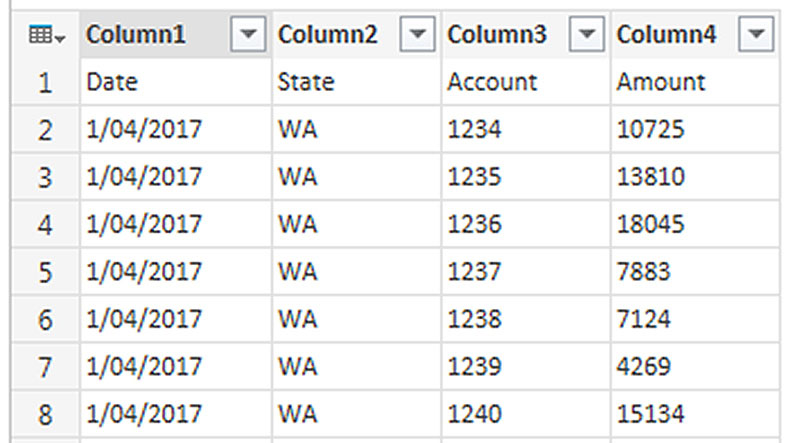
7. In Figure 7 the magic has happened. All the data rows from all the CSV files are listed one under the other in the Query Editor. We need to perform some data cleansing steps to prepare the data for use.

8. On the Home ribbon click the Use First Row as Headers icon – it does exactly what it says. See Figure 8.
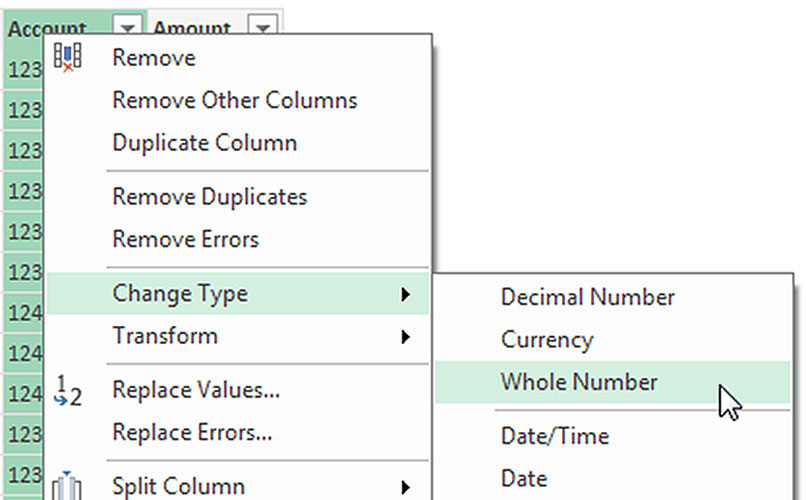
9. The numbers in the Account and Amount columns are left aligned. This means they are treated as text. Right-click the Account column, choose Change Type and choose Whole number. Right-click the Amount column, choose Change type and Currency. See Figure 9.
10. The Date column is also left aligned; change its type to Date.
11. The final step is to remove the headers from the other files; they are listed further down. When we changed the Date column to a Date type this caused the header rows below to display an error. We can use this error to filter out the header rows. Right-click the Date column and choose Remove Errors.
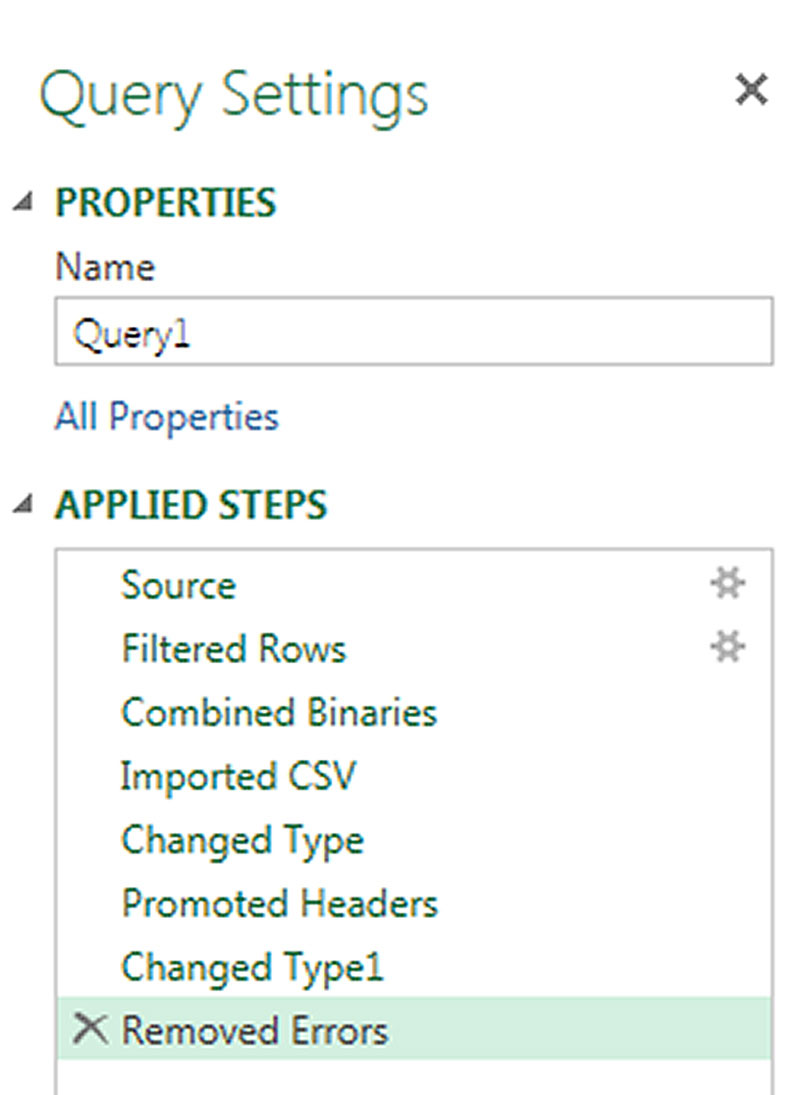
12. The final step is to click the Close and Load icon on the Home ribbon. All the steps you have performed are all listed on the right hand side of the Query Editor window. See Figure 10.
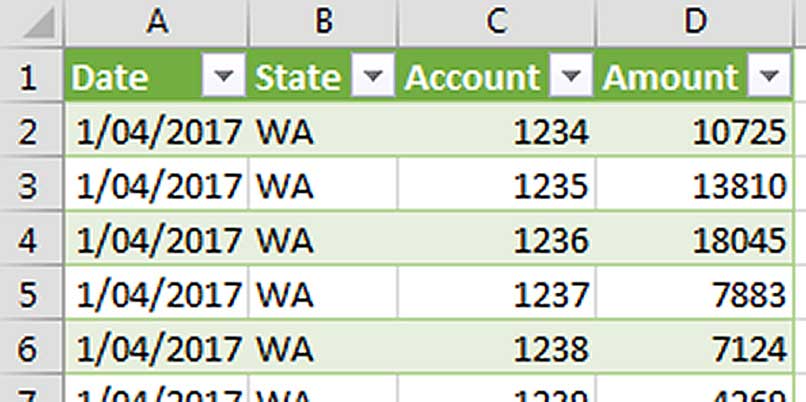
13. The final output table is shown in Figure 11.
Tricks of the trade
Sub-folders
One advantage of this technique is the Query automatically works with sub-folders. If you copy a new folder called 2016 containing the 2016 files into the Data folder and refresh the Query, the 2016 files would also be added to the data table.
Structures
This technique assumes the file structures (columns) are the same in all the files. If you change the file structure you would need to re-do the Query.
No undo – no problems
We have grown accustomed to Undo saving us so many times, we think we need it. Power Query is quick and easy to use. The above process takes a couple of minutes, so even if you have to start from scratch you’re not losing much time. All Steps in Figure 10 can be deleted using the X icon on the left of the step name.
Note: Deleting a step in the middle of all the steps can cause issues for subsequent steps and a warning message will be displayed. Sometimes it is better to remove the steps starting from the bottom of the list until you get to a problematic step, then restart from there.
Download these Excel files to follow along with the companion video.
Neale Blackwood CPA runs A4 Accounting, providing Excel training, webinars and consulting services to organisations around Australia. Questions can be sent to [email protected]

