Loading component...
At a glance
When you record a macro in Excel, you create a repeatable set of commands in a language called Visual Basic for Applications (VBA). A limitation of recorded macros is they don’t interact with the user.
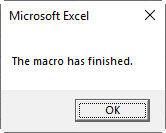
You can easily add basic interaction to a recorded macro by using message boxes. A message box allows simple one-way and two-way communication. Figure 1 has an example of a simple message box. If you are new to macros, the companion video will explain the basics.
A macro that takes a long time to run (you go and make a coffee after starting it) will often have a message box at the end to inform the user the macro has completed.
There are two common uses of message boxes:
- To tell the user something, e.g. display an error message.
- To ask a simple question, or confirm an important action, e.g. “Are you sure?” dialogs.
The only downside of using a message box is that the user must respond to the message box before the macro can continue. For this reason, they tend to be used at the start and/or at the end of the macro code.
You can't undo a macro
In case you didn’t know, running a macro clears the Undo list. This means that once you run a macro, you can’t undo anything the macro did or anything you did before you ran the macro. On a side note, many people are unaware that you can undo after you save in Excel and Office. This little known change happened in Office 2007.
The command that creates and controls message boxes is easy to use and includes many defaults.
Macro code
All the code that follows must be entered in the VBA code window. You can access this screen (separate to Excel) by pressing Alt + F11. The code window is on the right of the screen. The companion video will demonstrate these code examples and how to test and change them.
MsgBox command
The code to insert a simple message box is: MsgBox "The macro has finished.”.
This is an example of one-way communication. This command created the message box in Figure 1.
You can add a title to the message box dialog:
MsgBox “The macro has finished.”, , “File Update”.
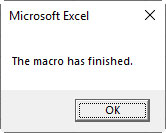
This displays the message box in Figure 2. The two commas between the text surround the button section of the MsgBox command (explained later). Since there is nothing between the two commas, the default OK button is used.
Two-way communication
When you want to capture the user response (which button was clicked), we need to use an If statement or a variable to capture that response.
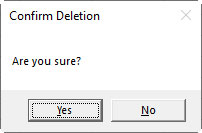
Let’s say we want to ask the user a Yes/No question. The following code will display the message box in Figure 3.
If MsgBox(“Are you sure?”, vbYesNo, “Confirm Deletion”) = vbNo Then Exit Sub This line of code stops the macro if the No button is clicked. It would be placed at the start of the macro, and the code to perform the task would follow.
The difference between one-way and two-way communication commands is the parentheses (brackets) around the settings. The parentheses instruct Excel to capture which button was clicked. The If statement uses the response and ends the macro using the Exit Sub command if the No button was clicked.
The prefix vb stands for visual basic. All the button names include the vb prefix.
Controlling the buttons
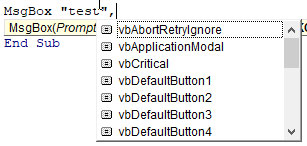
The middle section of the MsgBox command controls the buttons and icons. When creating a message box, a listing is displayed of all the button options as soon you type the first comma. See Figure 4:
The three main things you control are:
- The buttons displayed
- The icon displayed
- The default button
To combine options, you place a plus sign between each option. Figure 5 demonstrates the use of options showing the code and the message box created. Note the added icon, and the No button has the default dotted line within it. The dotted line signifies the button that is clicked when the user presses the Enter key.

Default buttons
When the macro is performing an important task, you may want to ensure the user has read the message box before responding. By setting the default to No (vbDefaultButton2), as shown in Figure 5, you force the user to mouse click the Yes button if they want to continue. If they just press Enter when the message box displays, then the default button No is returned and the macro stops.
Variables
Variables are a large topic in VBA, so I will just cover the basics that you need to know.
If you need to use the message box response more than once in the code, then you need to use a variable to capture the response. Let’s say a macro can create an audit log of its actions. It allows the user to decide whether to create the log or not. The user’s response will be used at various stages throughout the macro. If you don’t capture the response you will be repeating the question, which is inefficient and unnecessary.
Using variables requires two extra steps.
Defining the variable
At the top of your code you need to use the Dim statement (short for Dimension – an old programming term). This tells Excel that a variable will be used later in the code and what type of variable it is.
Dim AuditResponse As VbMsgBoxResult
The above code creates a variable called AuditResponse and defines it as message box result.
Capturing the user response
To capture the button the user has clicked, make the variable equal to the MsgBox command. You must use the parentheses in the MsgBox command. Figure 6 has sample code and the message box it creates.

The same If statement would be used whenever the code needs to do something that adds to the audit log.
Message boxes are a fun and easy-to-use part of macros and VBA. Using them makes your macros more interactive and professional.
The companion video and Excel files (blank & complete) will go into more detail to demonstrate these techniques.
Neale Blackwood CPA runs A4 Accounting, providing Excel training, webinars and consulting services to organisations around Australia. Questions can be sent to [email protected]
